

Android
Midscene connects to Android devices through adb to automate apps and system interfaces.
This guide covers device connection, model configuration, Playground, and JavaScript SDK integration with @midscene/android.
See it in action
Prompt: Open the Booking app. Search for a hotel in Tokyo for four adults on Christmas, with a score of 8 or above.
View the full report, or explore more Midscene showcases.
Get started
Prepare your Android device
Before scripting, confirm adb can talk to your device and the device trusts your machine.
Install adb and set ANDROID_HOME
- Install via Android Studio or the command-line tools
- Verify installation:
Example output indicates success:
- Set
ANDROID_HOMEas documented in Android environment variables, then confirm:
Any non-empty output means it is configured:
Enable USB debugging and verify the device
In the system settings developer options, enable USB debugging (and USB debugging (Security settings) if present), then connect the device via USB.
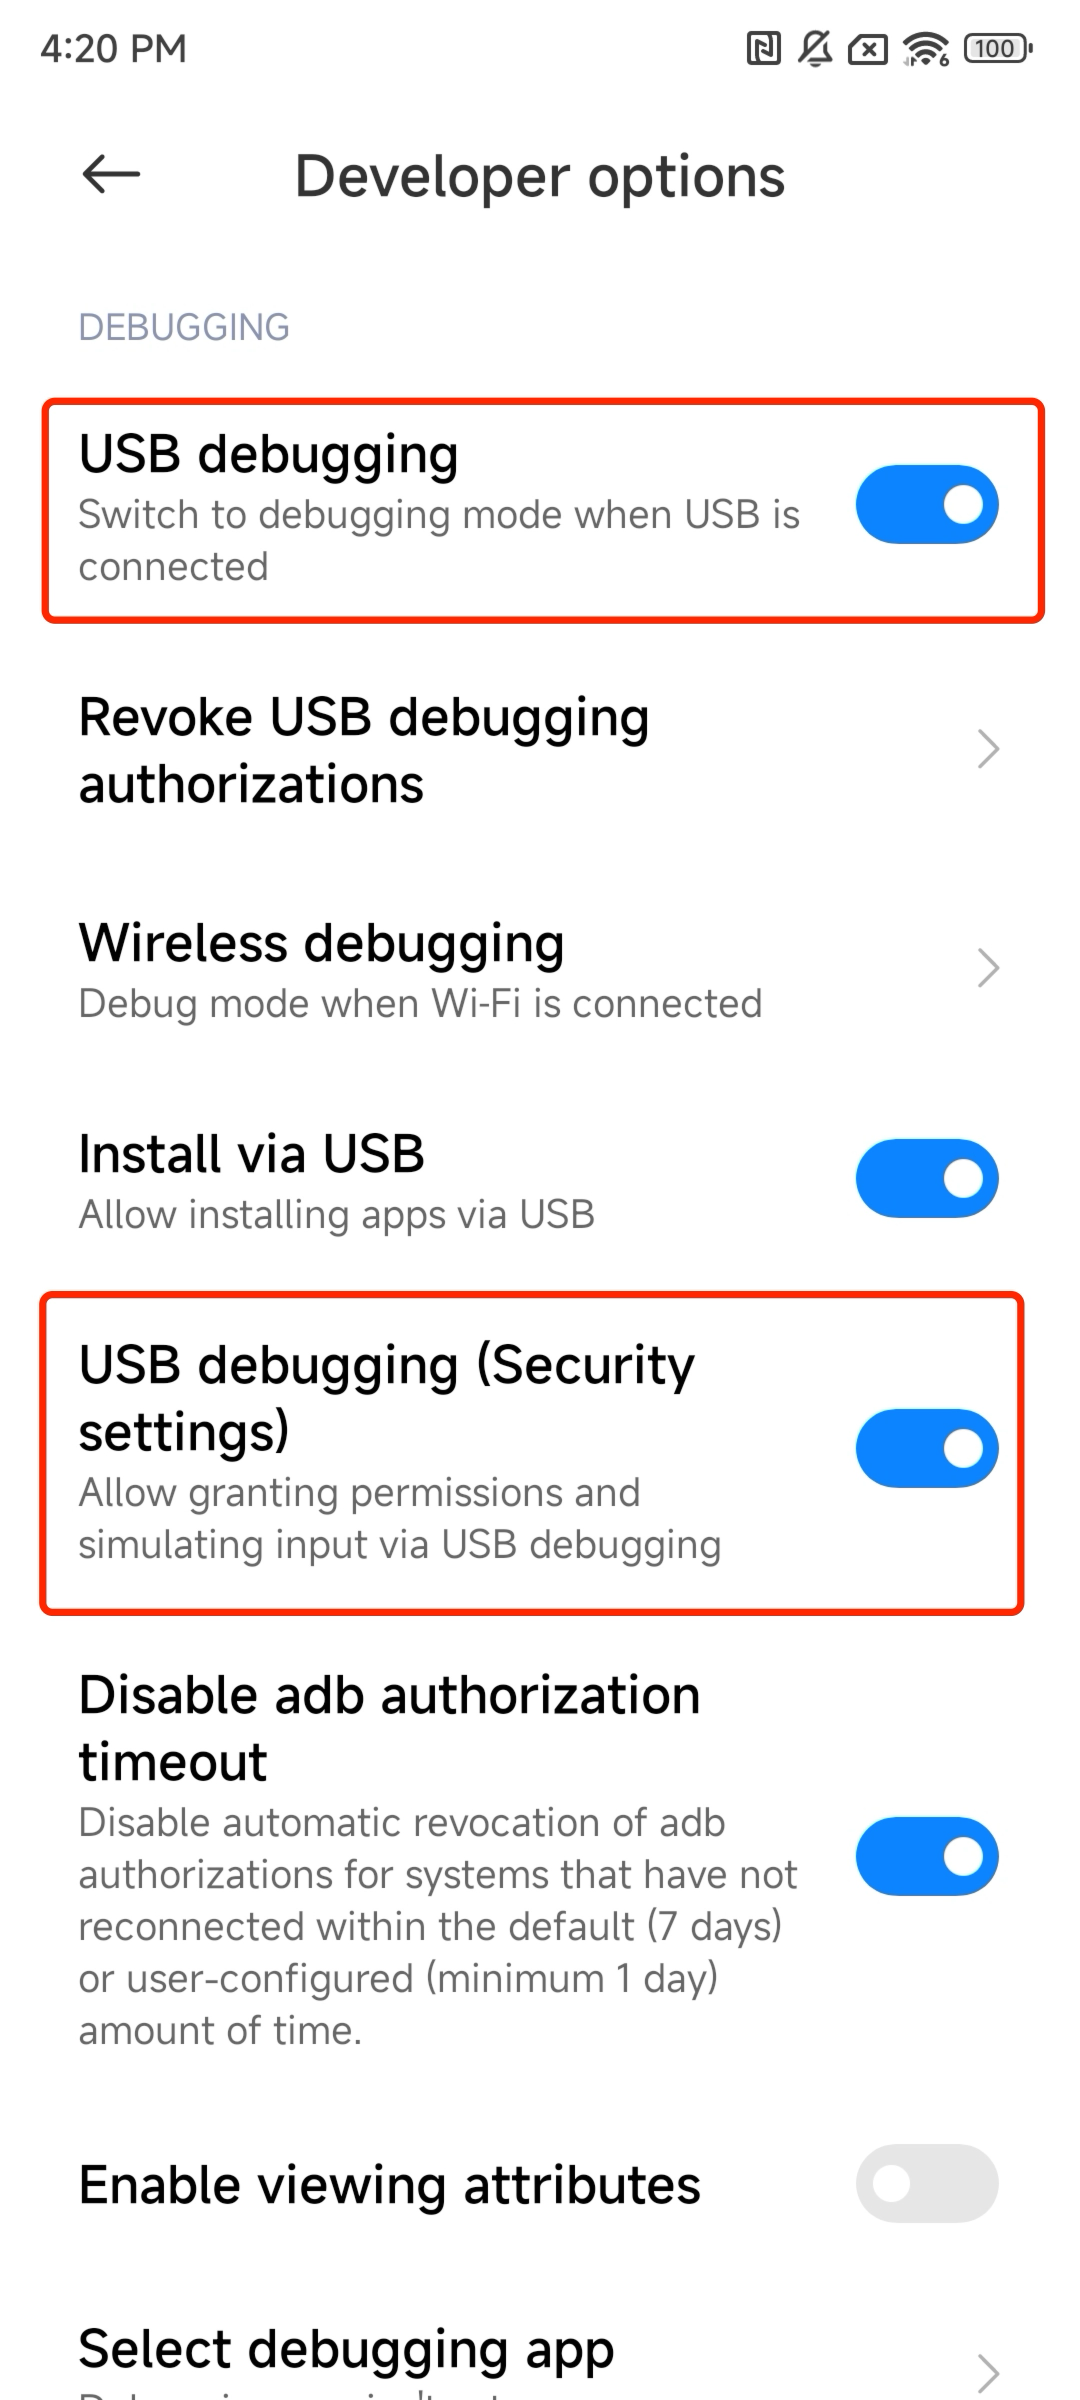
Verify the connection:
Example success output:
Launch Playground
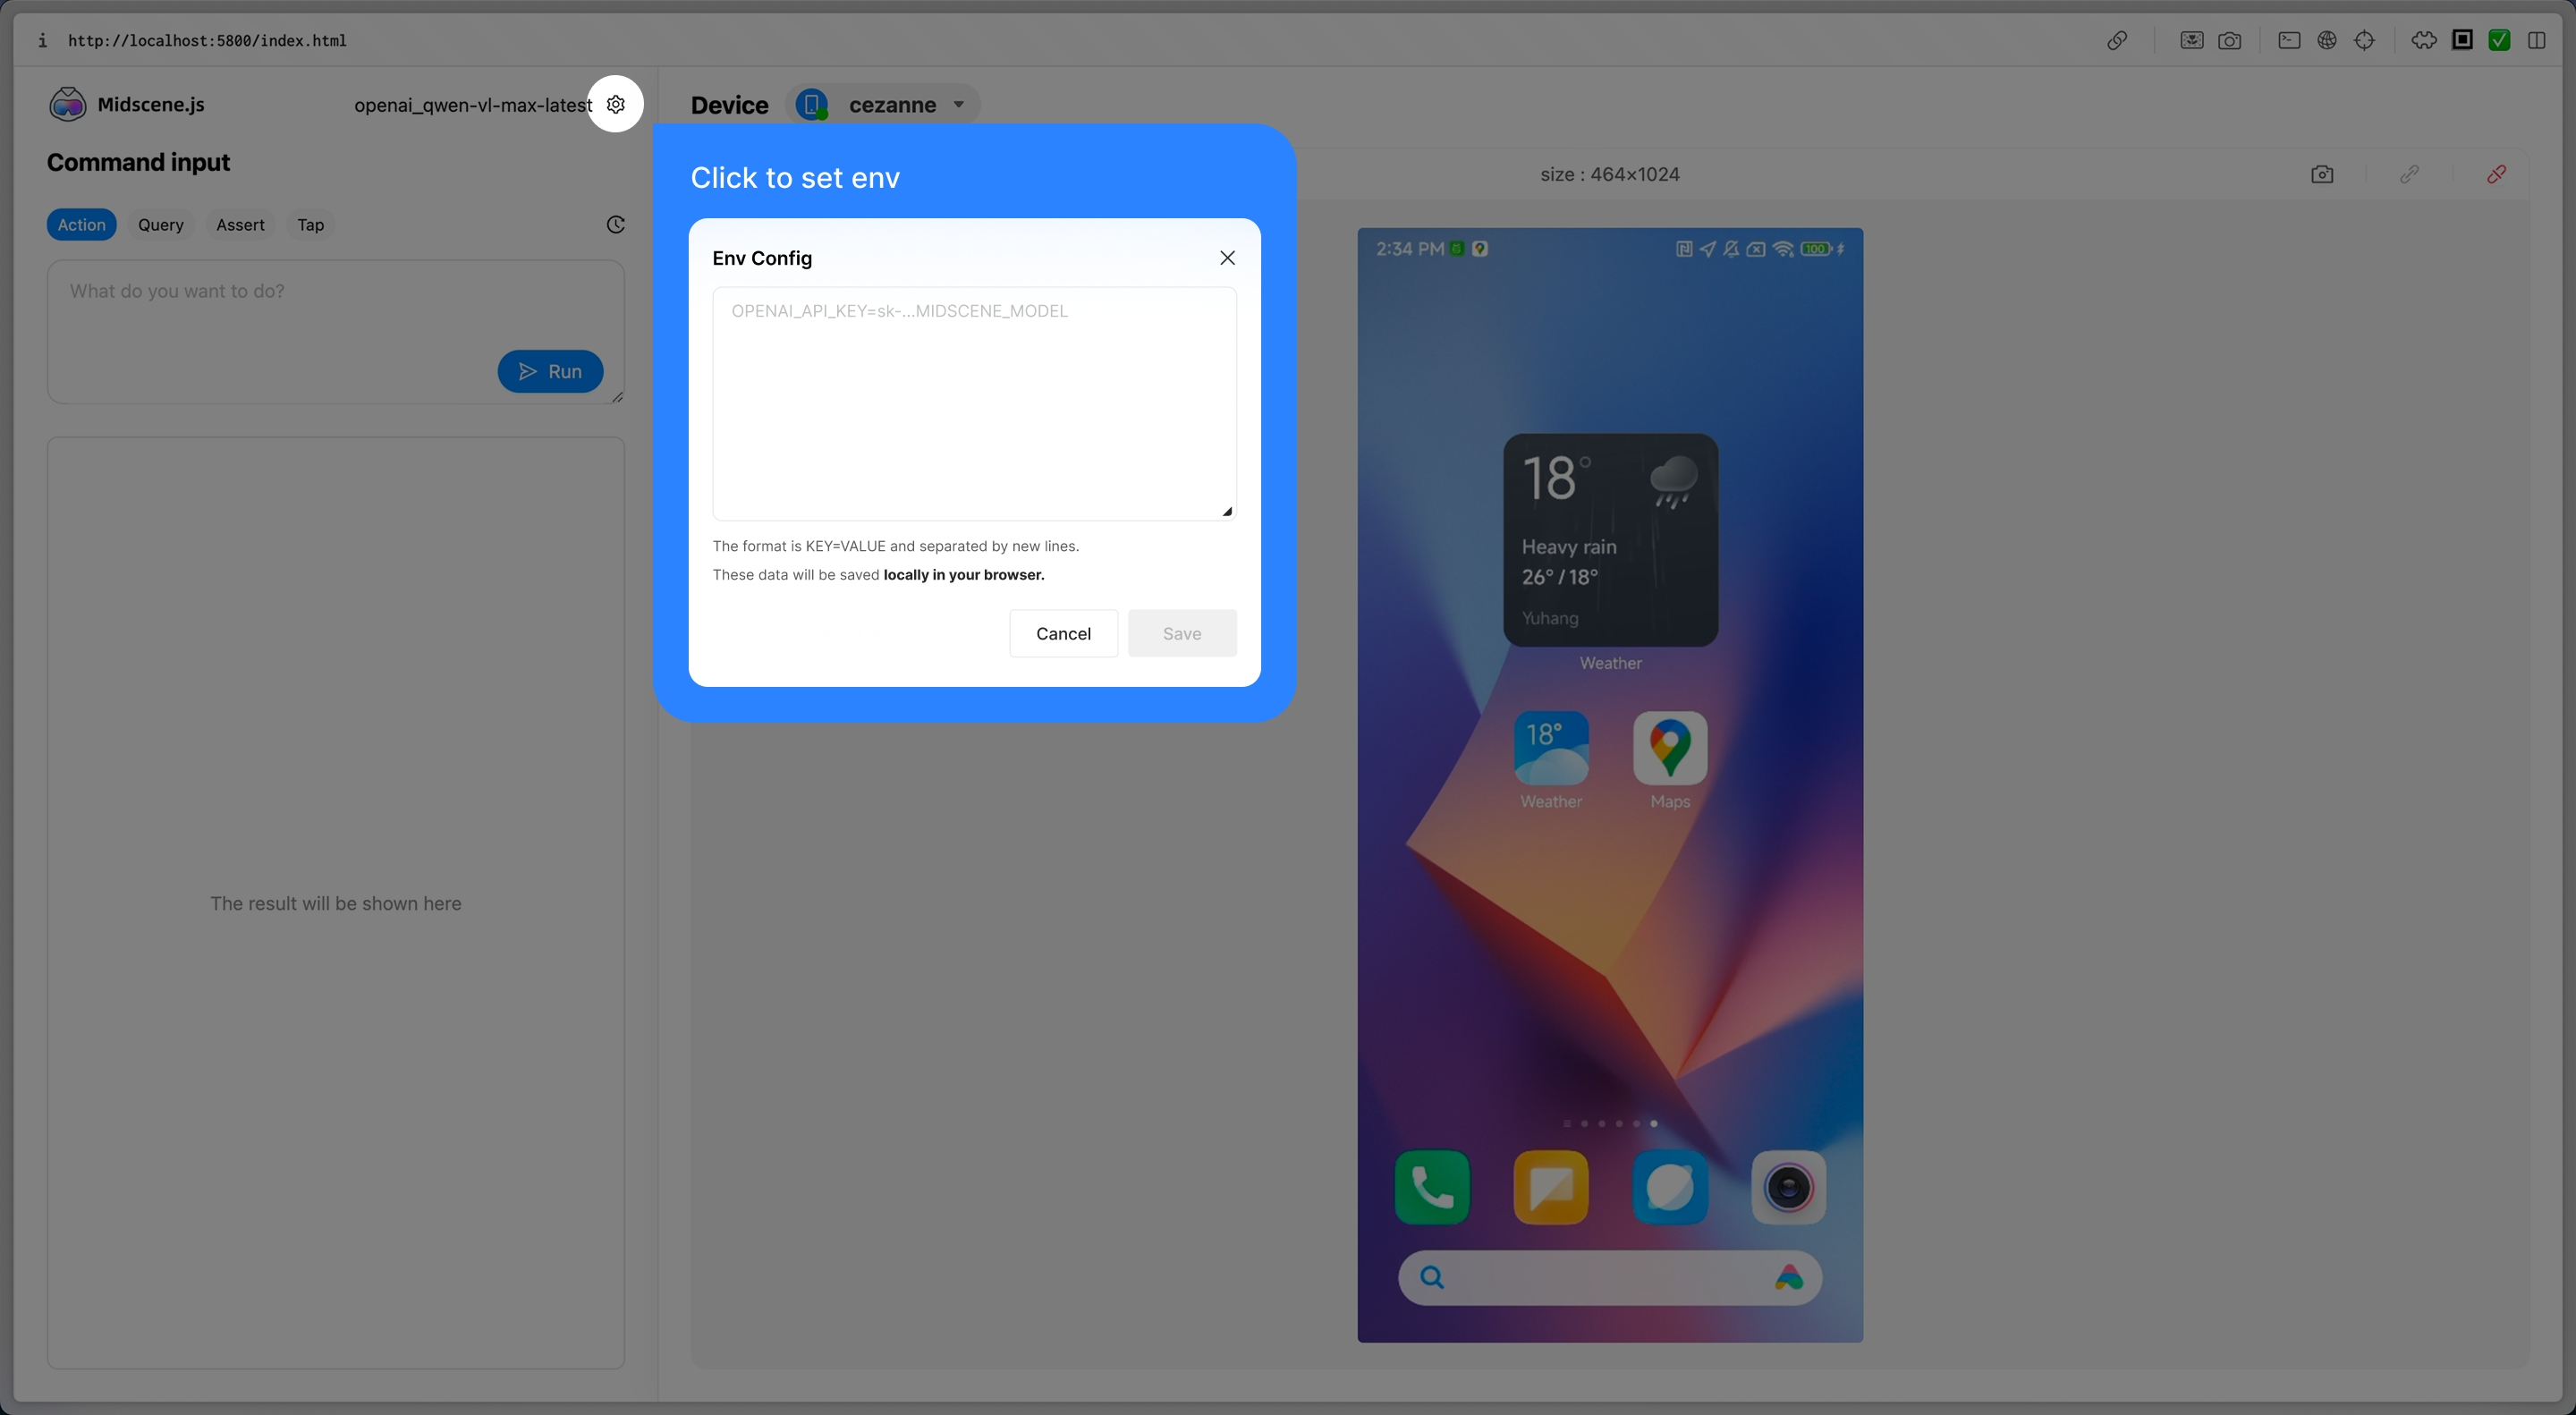
Playground is the fastest way to validate the connection and try core capabilities such as aiAct, aiQuery, and aiAssert without writing code. It shares the same core as @midscene/android, so anything that works here will behave the same once scripted.
- Launch the Playground CLI:
- Click the gear icon in the Playground window, then paste your API key configuration. Refer back to Model configuration if you still need credentials.
Use the JavaScript SDK
Once Playground works, move to a repeatable script with the JavaScript SDK.
Configure the model
Set the model configuration through environment variables. See Model strategy for guidance on choosing a model.
For all configuration options, see Model configuration.
Install dependencies
Write a script
Save the following code as ./demo.ts. It opens the browser on the device, searches eBay, and asserts the result list.
Run the script
View the report
Successful runs print Midscene - report file updated: /path/to/report/some_id.html. Open the generated HTML file in a browser to replay every interaction, query, and assertion.
Advanced
Use this section to customize device behavior, integrate Midscene into your framework, or troubleshoot adb issues. For detailed constructor parameters, see the Android section of the API reference.
Extend Midscene on Android
Use defineAction() for custom gestures and pass them through customActions. Midscene will append them to the planner so AI can call your domain-specific action names.
See Integrate with any interface for a deeper explanation of custom actions and action schemas.
More
- For every Agent method, check the API reference (Common).
- For Android-specific APIs, see API reference (Android).
- Use YAML automation scripts and command-line tools.
- Demo projects
- Android JavaScript SDK demo: https://github.com/web-infra-dev/midscene-example/blob/main/android/javascript-sdk-demo
- Android + Vitest demo: https://github.com/web-infra-dev/midscene-example/tree/main/android/vitest-demo
Complete example (Vitest + AndroidAgent)
Merged reports are stored inside midscene_run/report by default. Override the directory with MIDSCENE_RUN_DIR when running in CI.
FAQ
Why can't I control the device even though I've connected it?
A common error is:
Make sure USB debugging is enabled and the device is unlocked in developer options.
Text input is cleared or lost after typing
After entering text, Midscene automatically dismisses the keyboard. The default behavior sends an ESC key event. However, some input fields (especially those inside WebView) listen for the ESC key event, which can cause side effects such as:
- Clearing the text just entered
- Closing the popup/modal containing the input field
- Navigating away from the current page
You can try the following solutions in order of priority:
Option 1: Use the BACK key (Android back button) to dismiss the keyboard
Set keyboardDismissStrategy to 'back-first' to use the Android BACK key instead of ESC to dismiss the keyboard:
Option 2: Disable auto keyboard dismiss
If your input field also listens for the BACK key, you can disable auto keyboard dismiss entirely and let the AI Agent or subsequent actions manage the keyboard state:
With auto dismiss disabled, the keyboard will remain visible and may cover a large portion of the screen. You can work around this by:
- Using
aiActto manually dismiss the keyboard, e.g.await agent.aiAct('tap the collapse button on the keyboard') - Installing and switching to ADBKeyBoard — a minimal virtual keyboard that takes up very little screen space, so it barely affects screen interactions even when visible
English text is rewritten by the Android keyboard
If the report shows the correct input parameter, but the app receives different text, missing text, or Chinese/pinyin candidates, the active Android input method may be rewriting the text. This can happen when pure ASCII text goes through the native adb input text path while a Chinese keyboard or autocorrect keyboard is active.
Use the existing imeStrategy option and force all text input through yadb:
For YAML scripts:
Or set the environment variable:
This is different from text being cleared after typing. If the text is entered correctly and then disappears, check keyboardDismissStrategy or autoDismissKeyboard instead.
Screenshot of secure pages (e.g. password input) shows black
Some pages (such as password entry screens in banking or payment apps) set FLAG_SECURE to block screenshots. When screencap captures such a page, the secure region appears black.
The yadb tool creates a virtual display via the secure parameter of SurfaceControl.createDisplay, which can help capture secure content in some setups. Whether it can actually capture FLAG_SECURE pages depends on the Android version, ROM, root/hook environment, and device configuration (for example, some setups may require root plus a Magisk hook). Always verify against your actual device.
Use the screenshotStrategy option to force yadb for screenshots:
For YAML scripts:
Or set the environment variable:
The default is auto, which tries the screenshot methods in order: scrcpy → adb.takeScreenshot → screencap → yadb. auto does not analyze screenshot content — even if a command succeeds but returns a black frame, it will not automatically switch to yadb. It only moves to the next method when the previous one fails to execute. For secure pages that produce a valid but black image, set always-yadb to bypass the default auto flow (scrcpy, adb.takeScreenshot, and screencap) and use yadb directly. Yadb can only capture the default display (displayId=0), so combining always-yadb with a non-zero displayId throws an error.
How do I use a custom adb path or remote adb server?
Set the environment variables first:
You can also provide the same information via the constructor: